Access Webinato with a Web Browser - No Downloads Needed Any Longer!
Now you can use a web browser to access your Webinato webinar room!
Click HERE for more information
Changing the layout of your in-room modules is easy using the Layout Manager. Using this tool, you can change the position of many portions of the interface, choose to have them displayed in split-screen, and in general to change the look-and-feel of your room, all in real time.
Opening the Layout Manager
To access the Layout Manager, open your room and click the Main Settings and Options gear at the top right of the interface, then click the Layout Manager Tab.

Using the Layout Manager
Changing the layout of your room is as simple as choosing a location for the various module tabs via the pull down menus.
- First, to activate a module in your room, check the box next to the module name.
- Next, choose whether you want the module on the Left or Right portion of the interface, for a Split-Screen View.
- A Split-Screen View will allow you to show content from two media modules at the same time.
- If you do not want to have a split-screen interface, please set all active modules to be on the Left side. Any modules set to be on the Right side will cause the screen to be split, with designated modules on the Left or Right.
- If you have a split-screen interface, you can set the ratio of the left and right module sizes by moving the slider on the right side of the window. This is to allocate more space to one side or the other, depending on the content being shown on each side. You can also change this ratio by clicking and moving the divider from inside of the room and applying it to all participants.
- Finally, you can choose your Chat Module position:
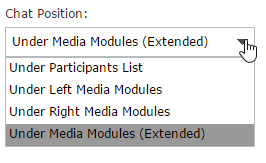
- NOTE: If you choose to show chat "Under Media Modules (Extended)", the chat will show whle the eCurtain is down, and will also show any Announcements that are posted before raising the eCurtain.
- If you want any changes made here to be permanent, check the box next to the option Make changes permanent. This will set the room to launch with these settings until they are changed again.
- Click the OK button to save your changes to the live room, in real time.
Was this article helpful?
That’s Great!
Thank you for your feedback
Sorry! We couldn't be helpful
Thank you for your feedback
Feedback sent
We appreciate your effort and will try to fix the article